krishworkstech.com

Part 11: Page Object Model (POM) Design in Appium (Android)

Part 11: Page Object Model (POM) Design in Appium (Android)

COVER 11
11

What Is a Page Object Model (POM)?

The Page Object Model (POM) is a design pattern used in test automation to:

  • Organize your code
  • Avoid duplication
  • Separate test logic from UI structure

In POM, each screen or page of your app becomes a separate Java class with:

  1. All element locators
  2. All interactions (like click, send text, etc.)

Why Use POM? — Table

Without POM

With POM

Repeating locators in every test

One place to manage locators

Messy and hard to maintain

Organized, modular structure

Hard to debug

Easy to debug or change in one place

Code is mixed with UI elements

Logic is clean and reusable

POM Project Structure Example

				
					AppiumProject/
│
├── base/
│   └── BaseTest.java
│
├── pages/
│   ├── LoginPage.java
│   └── HomePage.java
│
├── tests/
│   └── LoginTest.java
│
└── utils/
    └── DriverFactory.java


Step-by-Step Example: Login Page Using POM

Let’s create a POM structure for a simple login page with:

  • Username field
  • Password field
  • Login button

1. BaseTest.java (Reusable setup)

				
					package base;

import io.appium.java_client.android.AndroidDriver;
import io.appium.java_client.MobileElement;
import org.openqa.selenium.remote.DesiredCapabilities;

import java.net.URL;

public class BaseTest {
    public static AndroidDriver<MobileElement> driver;

    public void setup() {
        try {
            DesiredCapabilities caps = new DesiredCapabilities();
            caps.setCapability("platformName", "Android");
            caps.setCapability("platformVersion", "12");
            caps.setCapability("deviceName", "Android Emulator");
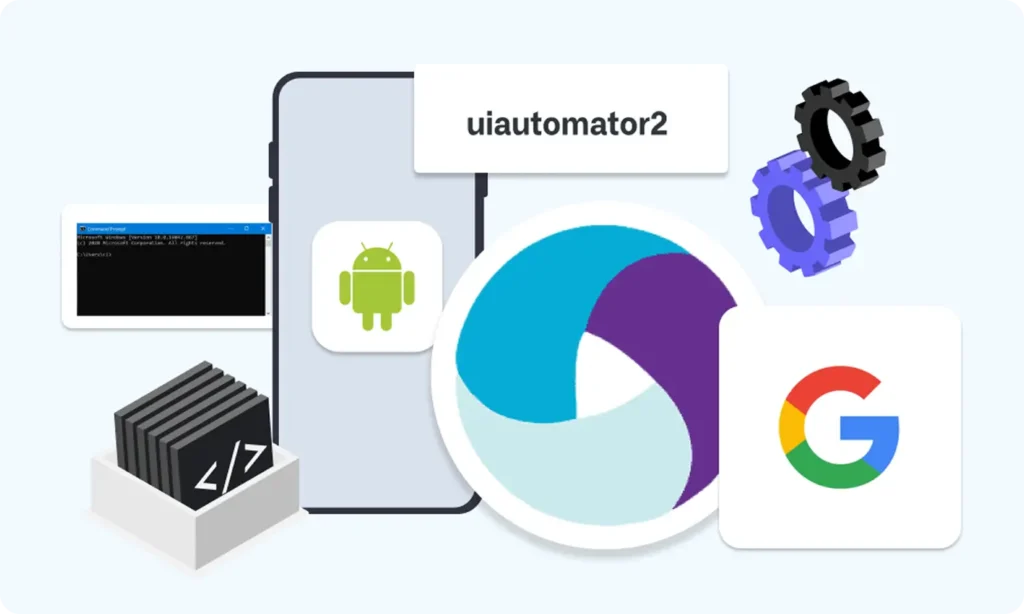
            caps.setCapability("automationName", "UiAutomator2");
            caps.setCapability("appPackage", "com.example");
            caps.setCapability("appActivity", "com.example.LoginActivity");

            URL url = new URL("http://127.0.0.1:4723/wd/hub");
            driver = new AndroidDriver<>(url, caps);
        } catch (Exception e) {
            e.printStackTrace();
        }
    }

    public void tearDown() {
        if (driver != null) {
            driver.quit();
        }
    }
}


2. LoginPage.java (Page Object class)

				
					package pages;

import io.appium.java_client.MobileElement;
import io.appium.java_client.android.AndroidDriver;

public class LoginPage {

    private AndroidDriver<MobileElement> driver;

    public LoginPage(AndroidDriver<MobileElement> driver) {
        this.driver = driver;
    }

    // Locators
    private String usernameField = "com.example:id/username";
    private String passwordField = "com.example:id/password";
    private String loginButton = "com.example:id/loginBtn";

    // Actions
    public void enterUsername(String username) {
        driver.findElementById(usernameField).sendKeys(username);
    }


    public void enterPassword(String password) {
        driver.findElementById(passwordField).sendKeys(password);
    }

    public void tapLogin() {
        driver.findElementById(loginButton).click();
    }
}


3. LoginTest.java (Actual test)

				
					package tests;

import base.BaseTest;
import pages.LoginPage;

public class LoginTest extends BaseTest {
    public static void main(String[] args) {
        LoginTest test = new LoginTest();
        test.setup();

        // Create Page Object
        LoginPage loginPage = new LoginPage(driver);

        // Test steps
        loginPage.enterUsername("admin");
        loginPage.enterPassword("1234");
        loginPage.tapLogin();

        test.tearDown();
    }
}


Benefits of This Approach

  • Easy to reuse LoginPage in multiple tests
  • If the app changes, update only one file
  • Clean separation of test logic and UI details

Real-World Tip:

As your app grows:

  • Make one class per screen
  • Add only reusable actions (like enterUsername() or tapLogin())
  • Your test scripts will become much easier to read and maintain.

Summary

What We Did

Why It Matters

Created BaseTest for setup

Centralizes configuration

Created LoginPage with locators

Encapsulates UI structure

Wrote clean test in LoginTest

Improves readability & reusability

Building complex IoT systems?

Accelerate testing and deployment with our QEMU-integrated toolchain expertise.

Mastering Appium: A Complete Beginner-to-Expert Mobile Automation Guide

image (5) (1)
COVER 3

Part 2 : Appium Architecture, Tools Setup & How Test Code Connects to Devices

COVER - PART 4

Part 3 : Java Fundamentals for Test Automation

Group 1707478330
COVER 3

Part 5 : Setting Up the Environment (Windows & macOS)

Group 1707478196 (1) (1)

Part 6 : Understanding UiAutomator2 (Android Engine)

Group 1707478196 (1)
COVER 3

Part 8 : Handling Waits and Synchronization in Appium (Android)

COVER - PART 4

Part 9 : Element Locator Strategies in Android (ID, XPath, etc.)

COVER 3 (2) (1)
COVER 3 (2)
COVER 3 (3)

Part 11 : Page Object Model (POM) Design in Appium (Android)

COVER 3
COVER 3 (2)
COVER 3 (3)

Part 11: Page Object Model (POM) Design in Appium (Android)

Scroll to Top
  • Schematic design
  • PCB and schematic source files
  • Assembling drawing files
  • Providing prototype/sample and production PCB service
  • Testing and validation of designed hardware
  • HIPAA
  • Azure Key
  • Management
  • ES, Checksum,
  • MD5sum
  • AWS
  • Azure
  • GCP
  • DigitalOcean
  • Kotlin
  • Python
  • Tensorflow
  • Computer Vision
  • ECG
  • SPO2
  • Heart Rate
  • Glucometer
  • Blood Pressure
  • UX UI Process
  • Figma and FigJam
  • Adobe Suite
  • Selenium Java
  • Postman
  • Swagger
  • Jmeter
  • SQL
  • Java Scripter
  • Test ng
  • Extents Reports
  • Flutter
  • Java
  • Kotlin
  • Swift
  • Dart
  • React JS
  • Python
  • NodeJS
  • Django
  • HTML, CSS, JS
RDBMS
  • PostgreSQL
  • Oracle
  • MySQL
  • MariaDB
No SQL Based
  • MongoDB
  • GCP
  • FirestoreDB
  • DynamoDB
  • Azure
  • CosmosDB
  • AWS