Raspberry Pi is a series of small, affordable single-board computers (SBCs) developed in the United Kingdom. Initially created by the Raspberry Pi Foundation in collaboration with Broadcom, it has since been developed by Raspberry Pi Ltd. These computers are compact, low-cost, and versatile, making them ideal for a wide range of applications from educational purposes to DIY projects.
Raspberry Pi is an affordable, versatile computer used for programming, web browsing, media streaming, robotics, and IoT projects, popular in education, research, and hobbyist applications.
Share at:
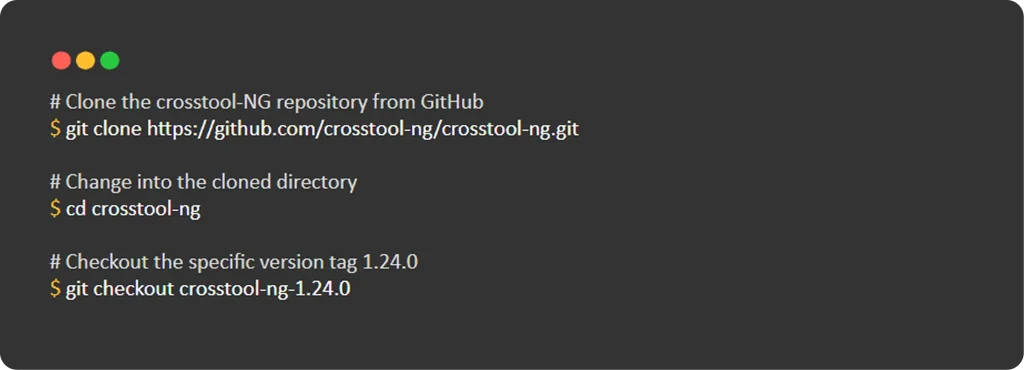
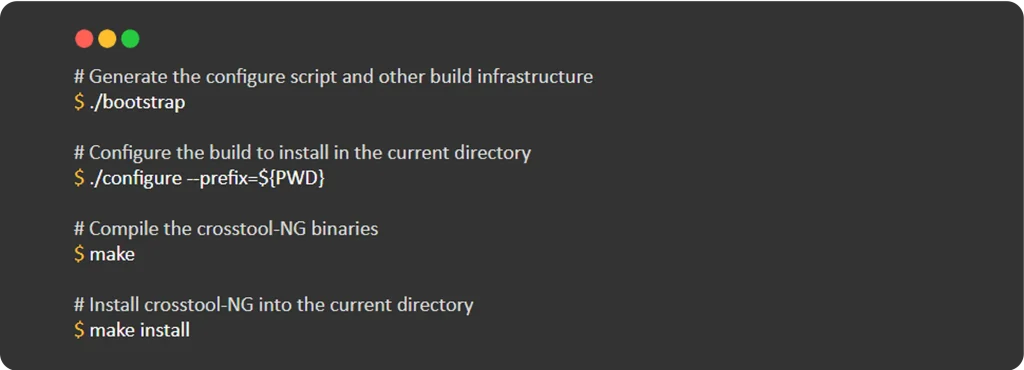
How to Install crosstool-NG for Cross-Compilation
Crosstool-NG is an open-source tool that helps automate the process of building cross-compilation toolchains. Originally based on Dan Kegel’s crosstool, it has evolved into a powerful, menu-driven utility. It allows you to create custom toolchains for different architectures, making it ideal for embedded development. The process typically involves steps like crosstool-ng download to fetch the required toolchain components and crosstool-ng install to build and install the complete toolchain.
Build a Custom Toolchain for Raspberry Pi 4
The Raspberry Pi 4 uses a Broadcom BCM2711 SoC, which contains a quad-core ARM Cortex-A72 (ARMv8-A) processor and a VFPv4 floating-point unit. Since the Raspberry Pi 4 has plenty of RAM and storage, glibc can be used as the C library. The closest crosstool-NG sample configuration for this is aarch64-rpi3-linux-gnu, which is designed for 64-bit (AArch64) systems, and can be customized according to the Raspberry Pi 4’s specific needs without rewriting the whole configuration.
Customizing RPi 3 config for RPi 4
1. To start customization, open the menuconfig for crosstool-ng:
2. Make the Following Changes:
Allow Extending Toolchain 1.1 Path: Paths and misc options -> Render the toolchain read-only 1.2 Change: False
Change ARM Cortex Core 2.1 Path: Target options → Emit assembly for CPU 2.2 Change: Cortex-A53 → Cortex-A72
To develop for the Raspberry Pi 4 (ARM Cortex-A72), use crosstool-NG to create a cross-compilation toolchain. Start with an ARMv8-A (AArch64) target and customize it as needed. This lets you compile 64-bit ARM software on your host machine and run it directly on the Raspberry Pi 4.
The build will take about half an hour. The toolchain will be installed in ~/x-tools/aarch64-rpi4-linux-gnu
Building complex IoT systems?
Accelerate testing and deployment with our QEMU-integrated toolchain expertise.
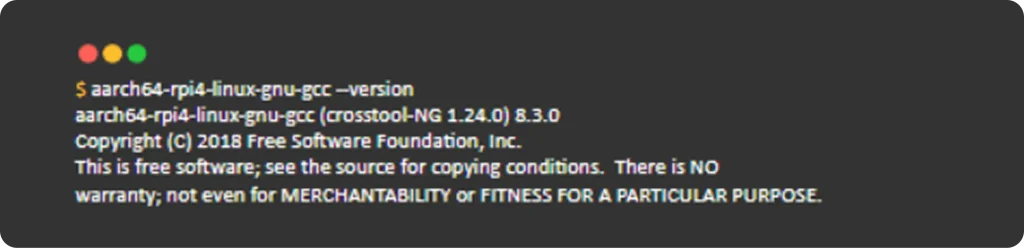
We previously saw how to setup cross compile environment. This command outputs the version of the cross-compiler, ensuring you’re using the correct version for your build.
Additionally, to check the sysroot used by your cross-compiler, you can run aarch64-rpi4-linux-gnu-gcc -print-sysroot. This command returns the path to the sysroot, which contains essential libraries and headers for the target architecture. The sysroot ensures that the correct dependencies are available during compilation, allowing your code to be built for the ARM target system.
Anatomy of a Toolchain
After building crosstools-ng in toolchain, it’s important to understand its structure and how to use it. The generated toolchain includes a cross-compiler and related tools located in a dedicated directory, which must be added to your system’s PATH to compile code for your target architecture.
Target: Raspberry Pi 4 Toolchain Prefix: aarch64-rpi4-linux-gnu- Toolchain Path: ~/x-tools/aarch64-rpi4-linux-gnu/bin
In the next part, we’ll see how to use this toolchain with a practical example targeting the Raspberry Pi 4 board.
How to Cross-Compile C Programs for Raspberry Pi 4 (ARM aarch64)
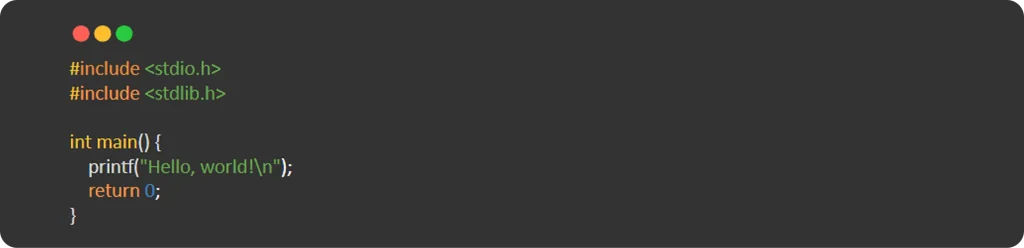
Step 1: Write a Simple C Program (helloworld.c) Create a new file named helloworld.c with the following content:
Just for reminder: C is portable at the source code level, but the compiled binary is architecture-specific.
Step 2: Compile the Program Using the Cross-Compiler Once you’ve written the program, you need to compile it for the target architecture. Assuming you’ve already set up the ARM aarch64 Cortex-A72 cross-compiler, use this command to compile the program for the Raspberry Pi 4 (ARM Cortex-A72, ARMv8-A)
aarch64-rpi4-linux-gnu-gcc: Specifies the ARM aarch64 Cortex-A72 cross-compiler helloworld.c: The source file we want to compile. -o helloworld: Specifies the output file name (helloworld).
Step 3: Verify the Binary After compiling the program, you can verify that the binary is correctly built for the ARM aarch64 architecture using the file command.
This confirms that the helloworld binary is an ARM aarch64 Cortex-a72 specific executable (not an x86 or other architecture binary). You can now run this on an Raspberry pi 4 with ARM aarch64.
Copy the helloworld binary file to the Raspberry Pi and run it to see the program’s output.
Step 4: Running ARM Cortex-A72 Binary on Raspberry Pi Run the Cross-Compiled Binary on Raspberry Pi
Note: To resolve issues with running a binary like helloworld, ensure that the required libraries, such as ld-linux-aarch64.so.1 and libc.so.6, are present in the /lib folder. If you encounter an error like “cannot open shared object file: No such file or directory,” it indicates that the necessary dynamic loader (ld-linux-aarch64.so.1) may be missing or located elsewhere. In that case, check if the library exists in directories like /lib/aarch64-linux-gnu/ and create a symbolic link to the correct loader using the following command:
To install an OS on Raspberry Pi, use the official Raspberry Pi Imager tool to write an OS image to an SD card. Then insert it into your Raspberry Pi and power it on.
No, you do not always need a monitor or keyboard for Raspberry Pi. You can set it up “headless” using SSH over Wi-Fi. Otherwise, you’ll need a monitor, keyboard and mouse for the first boot.
Scroll to Top
Understanding Toolchain and its Setup for Various Devices